Installing countertops is a big investment, often costing between $2,000 and $8,000. The final walkthrough is your last opportunity to ensure everything is installed correctly and meets your expectations. Here’s what you should focus on:
- Surface Quality: Check for uniform polish, smooth edges, and no visible damage.
- Measurements & Fit: Verify proper alignment with walls, cabinets, and appliances. Ensure cutouts for sinks, faucets, and cooktops are precise.
- Overhangs & Backsplashes: Measure overhangs for accuracy and inspect backsplashes for smooth transitions.
- Installation Stability: Use a level to confirm the countertop is even and securely attached. Test overhangs for proper support.
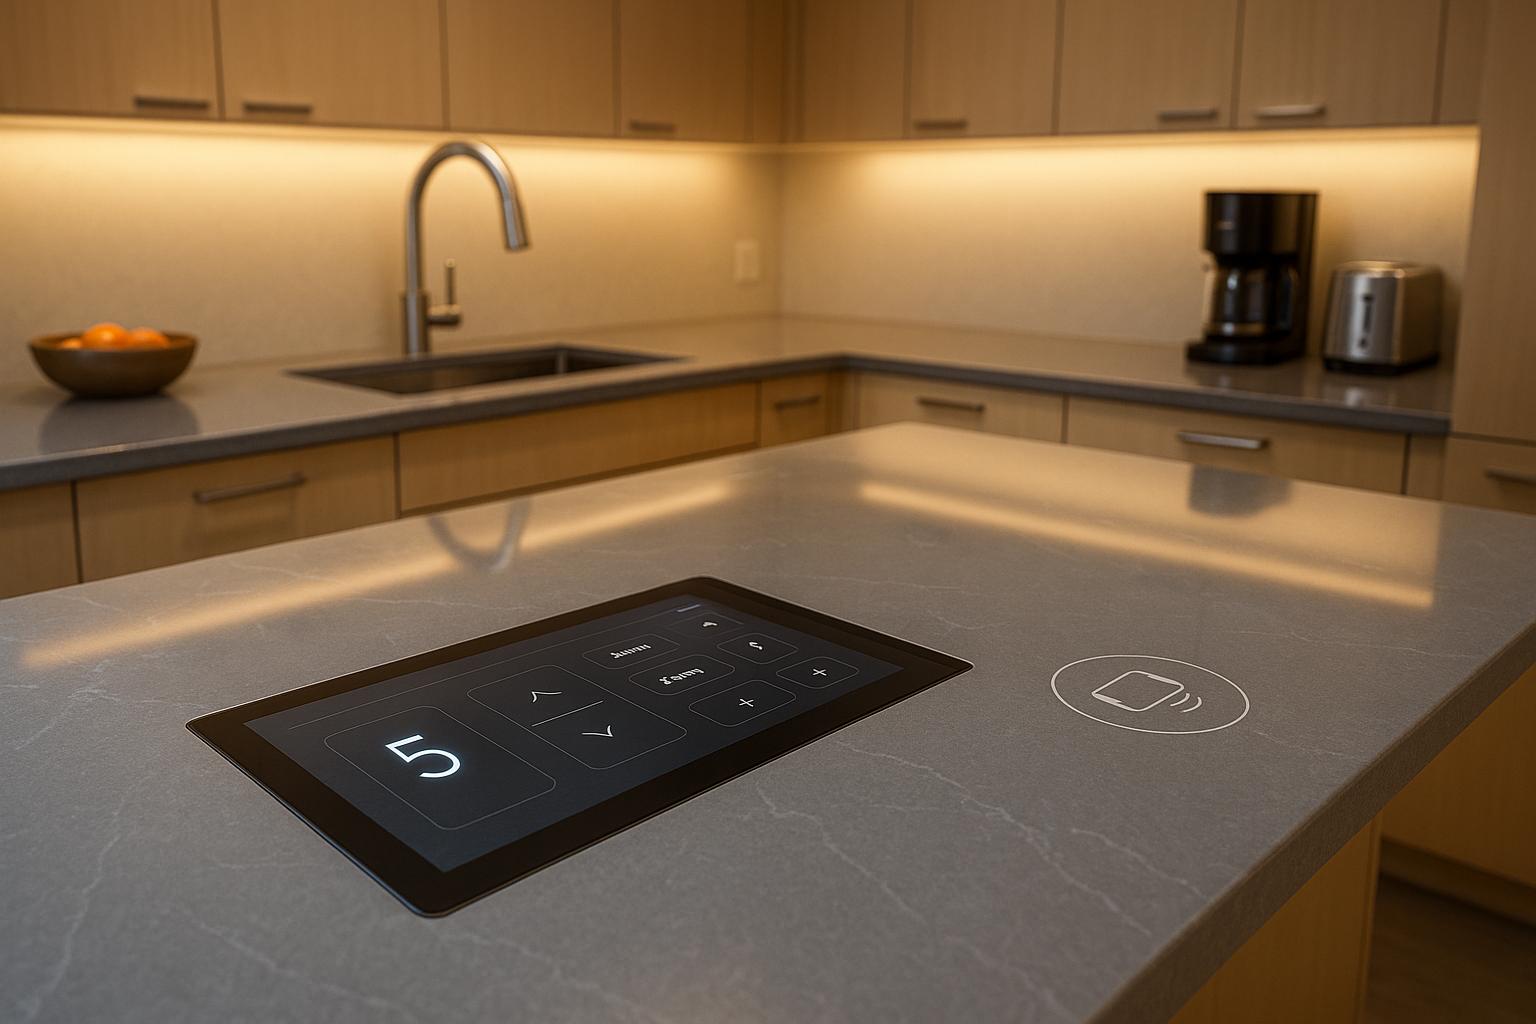
- Functionality: Test sinks, faucets, and appliances for proper operation. Ensure cabinets and drawers open and close without interference.
- Documentation: Get written warranties, care instructions, and sign the completion form only after a thorough inspection.
This walkthrough ensures your countertops are installed correctly, functional, and ready for use.
Surface Inspection and Finish Quality
Check Surface Finish and Sheen Uniformity
Take a close look at the countertop from eye level to confirm that the polish or sheen appears even throughout every section. This ensures a smooth and consistent finish.
Granite Countertop Installation: What to Expect!
Measurement Accuracy and Fit
Double-check that every countertop measurement aligns perfectly with your design. Precision is key here, so take your time inspecting each detail carefully.
Check Fit Against Walls and Cabinets
Examine how the countertops connect to both the walls and cabinets, keeping an eye out for gaps larger than 1/8 inch. Look at these areas from different angles to catch any signs of misalignment or bowing.
Focus on corner areas where countertops meet at 90-degree angles. These joints must align seamlessly without creating uneven surfaces or steps. Check the horizontal alignment where the countertops rest on the cabinets and the vertical alignment where they meet the walls.
Also, be on the lookout for sections where the countertop might bow away from the wall or where cabinet doors don’t close properly due to overhang issues.
Check Cutouts for Sinks, Cooktops, and Faucets
Verify that sink cutouts are properly centered and neatly trimmed. For cooktops, ensure openings are 1/16 to 1/8 inch larger than the appliance dimensions. Measure faucet hole placement from the sink edge to confirm it matches your layout.
Inspect the edges of all cutouts to ensure they are straight and square, as any imperfections will stand out once appliances are installed.
If your design includes accessories like a soap dispenser or water filter, confirm that all the necessary holes are present and spaced correctly according to your plans.
Check Overhangs, Backsplashes, and Edge Returns
Measure overhangs to confirm they fall within the recommended range: 1–1.5 inches for standard areas and 10–12 inches for breakfast bars. Use a tape measure to check these dimensions at multiple points along the overhang.
For backsplashes, ensure the transitions are smooth, with even spacing and patterns that align consistently.
Finally, inspect edge returns to verify they are uniform in thickness, blend seamlessly with the countertop, and are properly supported to avoid interference with cabinet doors or potential sagging in the future.
Installation Quality and Stability
A well-installed countertop is the foundation of both functionality and aesthetics. It needs to be solid, level, and securely attached to ensure durability and safety.
Check Level and Secure Installation
Start by using a level to check various points – corners, edges, and the center – to ensure the countertop meets the industry standard of being within 1/8 inch level over 10 feet. This small detail can make a big difference in the long-term performance of your countertop.
Press gently on different sections to detect any movement or instability. If there’s a sway, it might indicate improper fastening. Look underneath the countertop to confirm that screws, brackets, or other fasteners are securely in place. If shims were used for leveling, ensure they’re firmly positioned and providing proper support.
The foundation matters too. Double-check that the underlying cabinets are fully installed, level, and securely attached. Any gaps or irregularities between the countertop and surrounding walls or cabinets could signal an improper fit, which should be addressed before project completion.
Check Support for Overhangs
For countertops with extended sections or overhangs, like a breakfast bar, proper support is critical. Overhangs longer than 10 inches require sturdy supports such as brackets or corbels. These supports should be installed without obstructing seating areas or cabinet door movement.
Test the stability of the overhang by applying moderate downward pressure. This will help ensure it can handle everyday use, including the weight of someone leaning on it. Breakfast bar areas, in particular, should feel secure and solid under pressure.
Check Sealed Joints and Installation Damage
Once the structural aspects are confirmed, shift your focus to the finer details. Inspect all seam joints to ensure they’re properly sealed, especially around sinks and cooktops where water exposure is common. A good seal not only prevents water damage but also helps maintain hygiene.
Look closely at the surrounding areas for any damage caused during installation. Heavy materials, such as stone slabs, can sometimes leave scuffs on walls, dings on cabinets, or scratches on flooring. While minor marks may be expected and can often be touched up, significant damage – like large chips or deep scratches – should be addressed immediately. Pay extra attention to tight corners or spaces where installers had to maneuver heavy materials.
Lastly, check for dust and debris from on-site cutting. While some dust is inevitable, experienced installers should minimize it and ensure the area is cleaned before they leave. Confirm that all surfaces are free of debris and ready for use.
sbb-itb-e397dd0
Functionality and Final Details
Once your installation is complete, it’s time to make sure everything works as it should. Let’s go through a few key checks to ensure your kitchen is fully functional.
Test Sinks, Faucets, and Appliances
Start by running water in all the sinks to confirm proper drainage and check for any leaks. Turn the faucets on to test both hot and cold water flow. Pay close attention to any signs of moisture around connections, as this could indicate a loose fit. For appliances, test their electrical connections to ensure they’re working as expected. Keep in mind that countertop installers typically don’t handle plumbing or electrical reconnections, so you’ll need to call a licensed professional if there are any issues.
Check Cabinet and Drawer Functionality
Open and close every cabinet door and drawer to ensure they move smoothly. Make sure there’s enough clearance between the countertop edges and the cabinet doors or drawers to avoid any interference.
Care and Maintenance Instructions
Every stone type has its own care routine, so ask for specific maintenance guidelines for your countertop. For instance, quartz is relatively low-maintenance, while marble needs extra care to avoid damage from acidic substances.
Get a list of recommended cleaning products and make note of any that should be avoided. If your stone requires periodic resealing, ask about the recommended schedule to keep it in top condition. These details will help you maintain your countertops for years to come.
Documentation and Project Sign-Off
Once you’re satisfied with the quality and functionality of your countertop, it’s time to wrap up the project with proper documentation. Before the installer leaves, make sure this step is completed. Having the right paperwork not only protects your investment but also serves as a handy reference for the future.
Get Written Warranty and Care Instructions
Always ensure you receive written warranty documents. For natural stone, warranties typically range from one to ten years. Be sure to get both the manufacturer’s warranty and the installer’s warranty. Quartz countertops often come with longer warranties compared to natural stones like granite or marble.
These warranties cover different aspects: the manufacturer handles material defects, while the installer guarantees their workmanship. Keep both documents in a secure place – you’ll need them if issues arise down the line.
Additionally, ask for care instructions tailored to your specific stone type. Generic cleaning tips won’t suffice since each material has unique maintenance needs. Your care guide should outline recommended cleaning products, what to avoid, and special requirements like sealing schedules for natural stone.
Make sure you also have direct contact details for both the manufacturer and the installer. This will make it easier to address warranty claims or ask questions in the future.
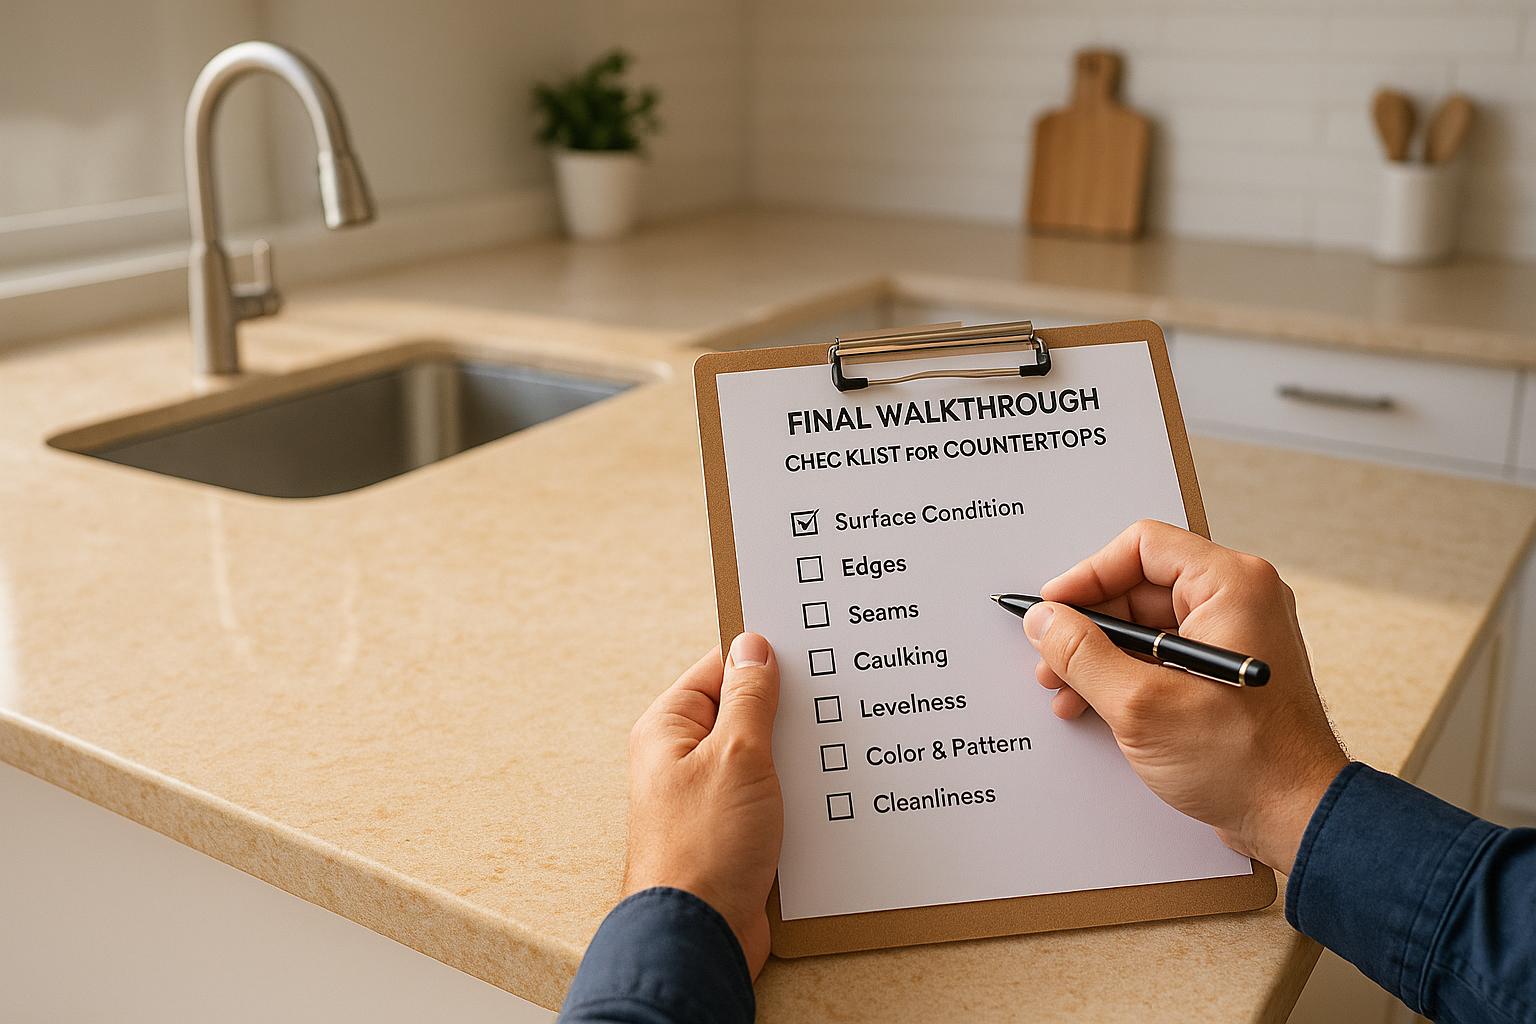
Sign Installation Completion Form
The installation completion form is your official acknowledgment that the work is done to your satisfaction. Before signing, take the time to thoroughly inspect the entire installation.
Use your checklist to spot even minor inconsistencies, and make sure to note any concerns directly on the form. Most professional installers are willing to schedule a follow-up visit to resolve outstanding issues, but this is easier to arrange before you sign off.
Be aware that once you sign the form, it becomes much harder to address problems under the installation warranty. The form essentially states you’re happy with the work as it stands, so take your time with the final inspection.
Ensure the form includes key details about your specific installation, such as the stone type, edge profile, square footage, and any special features like undermount sinks or decorative edges. This information is crucial for warranty claims and ensures everyone is clear on what was installed.
Finally, keep a signed copy for your records. This document not only proves the installation date and scope of work but can also be helpful if you decide to sell your home later.
MI Stone‘s Professional Process

When you choose MI Stone, you’re not just getting countertops – you’re partnering with a team dedicated to precision and quality from the very beginning. Every step of their process is designed to deliver results that stand out, as you’ll see during your final walkthrough.
MI Stone’s Installation Process
The journey begins with detailed measurements taken right in your home. MI Stone’s team creates custom templates to capture every nuance of your space, reducing the chance of surprises when it’s time for installation.
Fabrication happens in their state-of-the-art facility, where countertops are cut and finished to meet your exact specifications. This ensures a smooth installation process with minimal need for on-site adjustments.
During installation, the team pays close attention to structural details, such as proper support for overhangs and heavy materials like granite and marble. This careful approach ensures a solid foundation for their wide range of premium stone options.
MI Stone’s Stone Selection
Step into MI Stone’s showroom, and you’ll find an impressive selection of natural stones sourced from around the world. Their collection includes quartz, granite, marble, onyx, and porcelain, available in both tiles and slabs.
With such a variety, you can choose a material that fits your lifestyle and maintenance needs. Quartz stands out for its uniform patterns and easy upkeep, while granite and marble offer one-of-a-kind veining and timeless appeal. Onyx brings dramatic flair with its translucent beauty, and porcelain combines durability with a sleek, modern look.
In the showroom, you can view actual slabs and tiles to get a real sense of color, veining, and texture. This hands-on experience helps you make confident decisions before fabrication begins. And if you’re planning a full kitchen makeover, MI Stone can simplify the process by offering more than just countertops.
MI Stone’s Kitchen Renovation Services
MI Stone goes beyond countertops, offering complete kitchen renovation services, including cabinetry. This all-in-one approach makes it easy to coordinate your project, ensuring that everything – from cabinets to countertops – works together seamlessly.
Their design consultations help you create an efficient and stylish kitchen layout. By managing both cabinetry and countertops, MI Stone ensures that every detail, including proper support structures, is addressed from the start. Whether you’re updating a single element or reimagining your entire kitchen, MI Stone has you covered.
FAQs
What should I do if I see any flaws or damage on my countertops during the final walkthrough?
If you notice any imperfections or damage on your countertops during the final walkthrough, let your installer know immediately. Take clear photos and write detailed notes about the issue – this will be helpful if you need to file a warranty claim or arrange for repairs.
Make sure all concerns are resolved before you sign off on the installation to ensure you’re completely happy with the finished product.
How can I make sure my countertop overhangs are secure and safe for daily use?
To keep your countertop overhangs secure and stable, you’ll need the right support. If the overhang extends beyond 12 inches or exceeds 25% of the countertop depth, you’ll want to add support brackets or corbels. These should be spaced 18–24 inches apart, with brackets placed at both ends and set 4–6 inches from the edges for the best stability.
If you prefer a cleaner, more modern look, concealed steel supports are a great option. They offer strong, hidden reinforcement, keeping your countertop sturdy while maintaining a sleek appearance.
What documents should I ask for after my countertop installation to ensure everything is in order?
After your countertop installation, be sure to ask for a detailed contract or final invoice. This should clearly list the materials used, measurements, edge profiles, seam placements, and any other key installation details. It’s also a good idea to request a shop drawing or an owner’s guide that includes care instructions and warranty information. These documents are essential for safeguarding your investment and will come in handy for any maintenance or repairs down the road.